Wednesday, February 5, 2014

S150 Custom ROM developement

After a couple of months modifying the android 4.03 beta firmware for the S150 unit, we have finally an official build of the firmware.
Comparing the beta, many things has been fixed from Roadnav like GPS speed reading, 3rd party launchers behaviours, etc.. but some bugs and issue are still there and some new ones came up.
My intent is to try to fix some of the smaller bugs (even if probably I'll never be able to do it) and to be more comfortable making mods and flashing the firmware I decided to build an "Aroma installer".


The main advantage of the installer is that we can choose to make a full update of the firmware or to update just some parts of it like bootloader, kernel, configs, data, etc.. In this way will be easyer, quicker and safer to update all the custom ROMs that i'll build.

So here is the link to the first version of my custom Official 4.03 ROM:

Official 4.03 Aroma-Root_v1.0.rar

The only differences from the original, for now, it's just the root access and a build.prop mod to show more apps in the playstore faking the device as a Nexus 4G.
---------

A new version is available:
Official 4.03 Aroma-Root v1.1.rar 
 

The changelog is this:

12.02.2014 - Added Huge Apn list from CM10.1
10.02.2014 - Added Logo external folder.
                   - Modified Launcher2 with 8x4 grid and centered home.
07.02.2014 - Fixed Preinstall issue in aroma

I've added the possibility to load custom logos from a "logo" folder, in the same way happen for the apps preinstall.
Just add in the logo folder all the logos you want in the format:
mylogo.rle
mylogo.png

After flash you will find them in Settings->Device->boot logo
If you like you can set tem manually in the file personize.prop in the config folder like this:

ro.default.bootlogo=mylogo

Just specify the same name of the files


These are the instructions to create logos:
- create your logo in png format 800x480, 16 bit (32 bit is fine too, it will just be bigger in bytes and takes longer to load)
- convert it to rle format using the tool included in the rom archive PNG2RLE.
- create another png image for thumbnail preview with size 166x108
- name the rle and the thumb file with same name eg. mylogo.rle and mylogo.png

After flash you will find them in Settings->Device->boot logo
If you like you can set tem manually in the file personize.prop in the config folder like this:

ro.default.bootlogo=mylogo

Just specify the same name of the files

If you 'd like to do it without flashing you need root access and:
- copy these 2 files using root explorer (EsFileExplorer option enabled) in the Bootlogo\Logo folder
- go in settings->device->boot logo to apply your new logo.
-------------------------------------------------------------------------------------------------------------

New version of the rom:
http://kotixworld.blogspot.it/2014/05/new-s150-kotix-2.html


-------------------------------------------------------------------------------------------------------------


If you like my work consider to

Monday, December 16, 2013

S100 Platform - SkinPack  31/10/2013

It's almost a year since I started modifying the interface and functionality of my car dvd  unit and here you can download my latest job, a  package that contain 4 skins, a "Skinmanager", a "SkinTool" and a corrected english, italian and russian languages:


The skinpack will work on unit with firmwares up to 1.18.7, it will not work with newer firmwares 1.1.8 and up. 

If you have one of the new firmwares you cannot downgrade to older ones using the normal update procedure but it's still possible using a wince sd-recovery, just follow instructions included in the zip SDBOOT_wince.zip to fuse the  bootloader on the SD and copy the older firmware in it.

Personal note: the newer firmwares don't have any new relevant feature respect the 1.xx.7 series

A new firmware 1.6.9 just came out with a nice new feature: the possibilty to store the radio stations by RDS name. A new skinpack for this new firmware is available here:
New Skinpack 2014

Update 2: for firmware 1.7.9 you'll need this even newer skinpack
Skinpack 15/11/2014


Uncompress it in the root of Sd card and insert it in the GPS slot, then set the path of the navigation software to : \\Skinmanager\Skinmanager.exe

SkinManager will let you install or switch the UI skin in a couple of seconds, and right now you can choose between the original one, a slightly modified of the original, a Blueskin and a DarkRed skin.

Once the skins are installed, you don't even need the SD anymore, you'll find the SkinManager installed in the unit at section "Utility->pag2-> Extra" and from there you can switch skin in less then 10 seconds.
Once at least a skin is installed the original one will contain the skinmanager too.

  Original Skin light mod (Skin2)


BlueSkin (Skin3)


A small video showing BlueSkin in action:


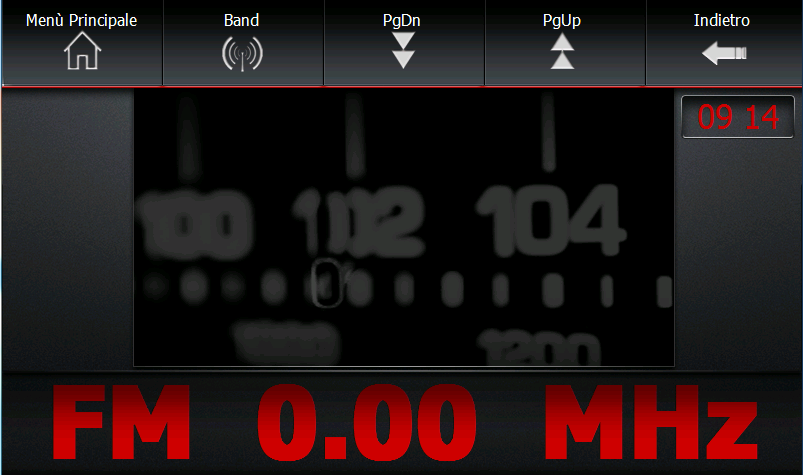
RedSkin (Skin 4)


----------------------

Skinpack Changelog :
31.10.13
- New "Audio settings" and "GPS path setting" sections in skin4
- Fixed installed English Skintool and scripts
- Added GPRS_AutoDial in Extras menu installable via Skintool
- Added mp3 buttons for c201 homescreen
- Fixed russian translation

19.10.13
- New install method using common files and skinned files
- Updated common files to latest 1.11.7 firmware (3G settings fix)
- Added Russian translation for skinned strings
- New messaging method during installations
- Added more confirmation sounds
- Fixed voPlayer launch
- Fixed Extras positions in skin 1 and 2
- Fixed home screen clock in skin3
- Skintool can update Extras and installed SkinManager
- Fixed skintool bug when applying a skin ( apply them from SM)

12/10/13
- New skin4
- Added in skintool option to set nitrogen as defaut player
- Added Extras install option

Since 31/10/13 you can have the  "Music" or "Mp3" button directly on home screen,  using a little trick that make the software think you  own a C201 model.


To do this you  have to edit with notepad the file ADSet.xml contained in the S100PROGRAM folder and change the id="YourIdNumber" to id="201":
for example my model  c001:
<?xml version="1.0" encoding="utf-8"?>
<!--注意属性与值之间中“=”要不留空格-->
<ADSet>
<versions></versions>
<DATE>
<define id="1" derivativeID="1" name="C001"/>
<openLogo id="19"/>
<LCD id="2"/>
<ADFunc id="0"/>
.........

will be:

<?xml version="1.0" encoding="utf-8"?>
<!--注意属性与值之间中“=”要不留空格-->
<ADSet>
<versions></versions>
<DATE>
<define id="201" derivativeID="1" name="C001"/>
<openLogo id="19"/>
<LCD id="2"/>
<ADFunc id="0"/>

Change just that, all the rest must REMAIN UNTOUCHED.

For the models with canbus must be modified the file MachineMapCanBus.xml and exchange the your model id with the C201 model

Enjoy :)


-------------------------------------------------------------------------------------------------------------
UPDATE: All the skinpack aren't free anymore, to download the skinpack you have to go to this post:
Once the payment is confirmed you will be redirected to the Skinpacks folder where you can find older versions, the curent one  and even the new ones when they will be available.


These are the packs included in the folder now:
- Skinpack 12.01.15 for fw 1.7.9
- Skinpack for fw 1.6.9
- SkinPack for fw 1.0.9.0 to 1.6.9
- SkinPack for fw up to 1.18.7

Wednesday, November 27, 2013

S100 - SkinPack del 31/10/2013

Qui trovate lo SkinPack per le autoradio della serie S100 contenente 4 skin, la lingua Italiana, l'Inglese ed il Russo, lo SkinManager e lo SkinTool:


Lo skinpack funziona con i firmware fino alla versione 1.18.7, non funziona con quelli più nuovi dal 1.1.8 in su e se avete un firmware di questa serie non potete fare nemmeno il downgrade.


Lo scomprimete nella root della SD e questa la mettete nello slot della SD per il GPS, nelle impostazioni settate il percorso del Navigatore a : \\Skinmanager\Skinmanager.exe

Lo SkinManager consente di installare e di cambiare l 'interfaccia grafica della radio in una manciata di secondi, al momento le skin disponibili sono quella originale, una versione modificata della skin originale, la Blueskin e la RedSkin.

Una volta installate tutte le skin non avete piu bisogno della SD troverete lo skin manager installato nella radio nella sezione "Utility->pag2-> Extra" e da lì potete cambiare skin a piacimento in meno di 10 secondi.
Dopo aver installato almeno una skin anche l'originale conterrà lo skinmanager e per toglierlo dovrete fare il ripristino con lo skintool.

Skin Originale modificata (Skin2)


BlueSkin (Skin3)


Piccolo video dimostrativo della BlueSkin:


RedSkin (Skin 4)


----------------------

Skinpack Changelog :
31.10.13
- New "Audio settings" and "GPS path setting" sections in skin4
- Fixed installed English Skintool and scripts
- Added GPRS_AutoDial in Extras menu installable via Skintool
- Added mp3 buttons for c201 homescreen
- Fixed russian translation

19.10.13
- New install method using common files and skinned files
- Updated common files to latest 1.11.7 firmware (3G settings fix)
- Added Russian translation for skinned strings
- New messaging method during installations
- Added more confirmation sounds
- Fixed voPlayer launch
- Fixed Extras positions in skin 1 and 2
- Fixed home screen clock in skin3
- Skintool can update Extras and installed SkinManager
- Fixed skintool bug when applying a skin ( apply them from SM)

12/10/13
- New skin4
- Added in skintool option to set nitrogen as defaut player
- Added Extras install option

Dal 31/10/13 c'è la possibilità di avere il pulsante "Musica" o "Mp3" direttamente nella home screen usando un piccolo trucco che consiste nel far credere al software della radio che il nostro modello sia un C201.


Per fare questo bisogna editare il proprio file ADSet.xml che si trova nella cartella S100PROGRAM con il notepad e modificare l'id="74" in id="201":
ad esempio per il mio modello c001:
<?xml version="1.0" encoding="utf-8"?>
<!--注意属性与值之间中“=”要不留空格-->
<ADSet>
<versions></versions>
<DATE>
<define id="1" derivativeID="1" name="C001"/>
<openLogo id="19"/>
<LCD id="2"/>
<ADFunc id="0"/>
.........

deve diventare:

<?xml version="1.0" encoding="utf-8"?>
<!--注意属性与值之间中“=”要不留空格-->
<ADSet>
<versions></versions>
<DATE>
<define id="201" derivativeID="1" name="C001"/>
<openLogo id="19"/>
<LCD id="2"/>
<ADFunc id="0"/>

Va modificato solo lì, il resto lasciate quello che avete voi, il tipo di lcd, derivativeID etc.. NON VANNO CAMBIATI.

Per chi dovesse avere un modello di autoradio con il canbus deve modificare anche il file MachineMapCanBus.xml e scambiare l'id del proprio modello con la 201.

Enjoy :)